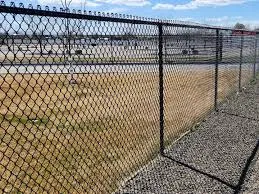
Setting Round Fence Posts A Comprehensive Guide
Fencing is a crucial aspect of property management, whether for enclosing livestock, creating a boundary, or enhancing your landscape aesthetics. Among the various types of fence posts available, round fence posts are popular for their strength, durability, and appealing natural look. In this article, we will explore the process of setting round fence posts effectively to ensure your fence stands strong for years to come.
Tools and Materials Needed
Before getting started, gather all the necessary materials and tools to streamline the process. You will need
- Round fence posts - Concrete mix or gravel (for better drainage) - Post hole digger or auger - Level - Measuring tape - String line - Hammer - Safety gear (gloves, goggles)
Step 1 Planning and Measuring
The first step in setting round fence posts is to plan your layout. Determine the location of your fence and how many posts you will need. Use a measuring tape to mark the distance between posts; typically, this should be around 6 to 8 feet, depending on the type of fencing being installed.
To maintain a straight line, drive stakes into the ground at each end of your fence line and attach a string line between them. This will serve as a guide for setting your posts.
Step 2 Digging the Post Holes
Next, use a post hole digger or auger to create holes for your round fence posts. The holes should be at least 2 to 3 feet deep, depending on the height of the fence you are installing. A deeper hole will provide better stability, especially in areas with high winds or unstable soil.
As you dig, ensure that the diameter of the hole is wide enough to accommodate the post while allowing for drainage. A hole about three times the diameter of the post is often recommended.
Step 3 Positioning the Posts
setting round fence posts

Once the holes are dug, it's time to set the posts. Place a round fence post in the center of each hole, ensuring it is upright and straight. To check for vertical alignment, use a level. It’s essential that the post stands perfectly vertical, as this will affect the overall look and structural integrity of the fence.
If you’re using multiple posts, place them one by one, taking care to maintain a consistent height and alignment.
Step 4 Backfilling and Securing the Posts
With your posts in place, it’s time to secure them. You have two primary options concrete or gravel.
Using Concrete If you choose to use concrete, mix it according to the package instructions, then pour it into the hole around the post. Leave some space at the top of the hole for drainage and tamp it down to eliminate air pockets. Allow the concrete to cure for at least 24 to 48 hours before moving on to the next steps.
Using Gravel For a quicker option, you can backfill with gravel. Add several inches of gravel to the bottom of the hole first for good drainage. Then, fill the rest of the hole with gravel, packing it tightly around the post as you go.
Step 5 Finishing Touches
Once all your posts are set and secured, remove any excess dirt or gravel around the base. If you're planning to install fencing panels, now is the time to measure and cut them to fit between your posts.
Consider treating or painting your round fence posts if they are not already treated. This can enhance their resistance to weather elements and extend their longevity.
Conclusion
Setting round fence posts is a straightforward task that can significantly enhance your property. Whether you choose to use concrete for durability or gravel for convenience, proper installation is key to ensuring your fence will last. With this guide, you should be well-equipped to embark on your fencing project, creating a secure and attractive boundary that meets your needs. Happy fencing!


