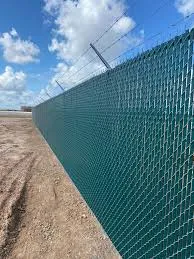
Setting Fence Posts in Dirt A Comprehensive Guide
Installing fence posts is an essential part of building a sturdy and reliable fence, whether for residential, agricultural, or security purposes. Properly setting fence posts in dirt is crucial for ensuring the integrity and longevity of your fence. This guide will walk you through the necessary steps and tips to achieve your fencing goals effectively.
Choosing Your Materials
Before you begin, it’s essential to select the right materials. Fence posts can be made from various materials such as wood, vinyl, or metal. Wooden posts are popular for their aesthetic appeal and traditional look, but they may require treatment to resist rot and insect damage. Metal posts, on the other hand, are more durable and can withstand harsher weather conditions. Depending on your needs, you’ll also need concrete, gravel, or soil to secure the posts and help with drainage.
Tools and Equipment
Having the right tools is essential for setting fence posts correctly. You will need
- A post hole digger or auger - A level - A measuring tape - A shovel - A hammer or a mallet - Concrete mix (if using concrete) - Gravel (optional, but recommended for drainage)
Steps to Set Fence Posts
1. Planning and Layout Before digging, plan your fence line. Measure and mark the locations for each post with stakes or chalk. It’s crucial to maintain consistent spacing between posts, typically 6 to 8 feet apart, depending on the type of fence you’re installing.
2. Digging the Holes Use a post hole digger or auger to create holes for the posts. Holes should be about three times the width of the post. For standard 4x4 wooden posts, a depth of 2 to 3 feet is often recommended, depending on local frost lines and soil conditions. Deeper holes typically offer more stability.
setting fence posts in dirt

3. Adding Gravel If you’re in an area with poor drainage, consider adding a few inches of gravel to the bottom of the hole. This helps prevent rot and ensures water drains away from the post, extending its lifespan.
4. Setting the Posts Place the fence post in the center of the hole. Use a level to make sure it’s vertical. You may need a partner to hold the post in place while you work. If you're working alone, temporary braces made from scrap wood can help stabilize the post.
5. Filling the Hole After ensuring the post is level, fill the hole with soil or a concrete mix. If using concrete, follow the manufacturer’s instructions for mixing. Pour the concrete around the post, making sure it completely covers the post hole. If filling with soil, ensure you pack it tightly around the post to eliminate any air pockets, which can lead to instability.
6. Setting Time If using concrete, allow it to set according to the package instructions, usually 24 to 48 hours. During this time, avoid placing any stress on the post. If you’re using regular soil, give it a day to settle before continuing with the fence installation.
7. Final Checks Once the posts are set and secure, double-check their vertical alignment. Make any adjustments if necessary before proceeding to attach your fencing material.
Maintenance Considerations
After your fence posts are installed, maintenance is vital to ensure their longevity. Regularly check for signs of wear and tear, such as rotting in wooden posts or rust in metal posts. Replacing damaged sections promptly can save you time and money in the long run.
Conclusion
Setting fence posts in dirt may seem daunting, but with proper planning and execution, it can be a straightforward process. By following these steps and using the right materials, you can build a strong and durable fence that serves its purpose for years to come. Happy fencing!


