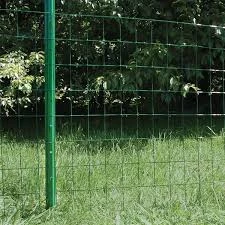
Setting Corner Fence Posts A Comprehensive Guide
Fencing is an essential aspect of any property, contributing to security, aesthetics, and defining boundaries. One of the most critical components of a sturdy and well-structured fence is the corner fence post. These posts bear the tension of the entire fence and provide stability against weather conditions. Therefore, setting corner fence posts correctly is paramount for a durable fence. This article provides a step-by-step guide on how to properly install corner fence posts.
Materials and Tools Needed
Before starting, make sure you have all the necessary materials and tools. You will need
- Corner fence posts (typically stronger than regular posts) - Post holes digger or auger - Concrete mix (Quick-setting concrete is often recommended) - Gravel (for drainage) - Level - Tape measure - String line - Hammer - Safety goggles and gloves
Step 1 Planning the Layout
Begin by planning your fence layout. Use stakes and string to mark the corners of your fence line. Ensure that you measure the distance between your corner fence posts accurately, taking into account the length of the fencing panels you will use.
Step 2 Digging the Holes
After marking the positions, it's time to dig the holes for your corner fence posts. A typical recommendation is to dig a hole that is one-third the length of the post, which generally means about 2-3 feet deep depending on the height of the fence. The holes should be wider at the bottom than at the top for better stability. For instance, a 4x4 inch post would usually require a hole that is about 12 inches wide at the bottom.
Step 3 Preparing the Base
After digging the holes, add about 6 inches of gravel to the bottom of each hole. This gravel will provide drainage, ensuring that moisture does not rot the posts over time. Compact the gravel to create a firm base for the post.
Step 4 Setting the Posts
setting corner fence posts

Place the corner fence post into the hole and have a helper hold it upright. Use a level to ensure the post is vertical. It is important at this stage to make sure the post is perfectly aligned, as adjustments become more challenging once the concrete sets.
Step 5 Mixing and Pouring Concrete
Follow the instructions on your concrete mix to prepare it. Pour the mixed concrete into the hole around the post, ensuring there are no air pockets. Fill the hole to ground level. If you want a neat finish, you can slope the top of the concrete away from the post to direct water away from it.
Step 6 Allowing to Set
After pouring the concrete, it is vital to allow it to set. Generally, quick-setting concrete takes about 20 to 40 minutes to harden enough to handle. However, it is advisable to let it cure for at least 24 hours before applying any pressure or attaching fencing panels.
Step 7 Backfilling
Once the concrete is set, backfill the hole with the original soil, packing it down tightly to eliminate any voids. This will help stabilize the post further.
Step 8 Final Checks
After the posts are set and the area is cleaned up, perform a final check with the level to ensure everything is straight and secure. Adjust if necessary before proceeding with the rest of your fencing.
Conclusion
Setting corner fence posts may seem daunting at first, but by following these steps, you can install them confidently and correctly. A well-set corner post will not only provide strength and security to your fence but will also enhance the overall appearance of your property. Remember, proper planning and execution are key, so take your time to ensure everything is done right for a fence that will last for years to come. Happy fencing!


