
Setting a Concrete Fence Post A Step-by-Step Guide
Building a fence is a great way to enhance the privacy and aesthetic appeal of your property. Among the many elements that go into installing a fence, the most crucial is setting the fence posts, especially if you are choosing concrete as your foundational material. Concrete fence posts are durable and long-lasting, making them a popular choice for homeowners. This article will guide you through the process of setting a concrete fence post, ensuring that your fence is sturdy and reliable.
Step 1 Gather Your Tools and Materials
Before you begin, it’s essential to gather all the necessary tools and materials. You will need
- Concrete fence posts - Gravel - Quick-setting concrete mix - Post hole digger or auger - Level - Measuring tape - String line - Shovel - Tamping tool - Safety gloves and goggles
Having everything ready will streamline the process and prevent unnecessary interruptions.
Step 2 Planning the Layout
Start by marking the location of your fence posts. Use a measuring tape to determine the distance between posts, usually 6 to 8 feet apart, depending on your fence type. Once marked, run a string line between the markers to ensure that your posts will be aligned correctly.
Step 3 Digging the Post Holes
Using a post hole digger or auger, dig holes for your concrete posts. The depth of the holes will typically need to be one-third of the height of the post. For instance, if you are using an 8-foot post, your hole should be about 2.5 feet deep. Make the holes at least 10 inches wide to provide ample space for the concrete to anchor the post firmly.
Step 4 Preparing the Concrete Mix
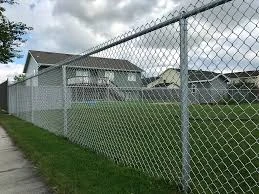
setting a concrete fence post
While you’re digging the holes, prepare your concrete mix according to the manufacturer’s instructions. If you’re using a quick-setting concrete mix, the process will be faster, allowing you to set the posts without waiting for long periods. Make sure to mix it in a bucket or wheelbarrow to achieve a consistent texture.
Step 5 Setting the Posts
Once the holes are ready and your concrete mix is prepared, it's time to set the posts. Place the first concrete post into its hole and ensure it is standing straight. You can use a level to check that the post is plumb (vertically straight). If necessary, adjust the position of the post before securing it.
After ensuring the post is correctly aligned, pour the mixed concrete into the hole around the post. Fill the hole to the top, and then use a tamping tool to firmly pack the concrete around the post to eliminate any air pockets. This step is crucial as it enhances the stability of the post.
Step 6 Allow to Cure
After setting the first post, repeat the process for the remaining posts along your fence line. Once all the posts are set, allow the concrete to cure as per manufacturer instructions. Generally, quick-setting concrete will take about 24 to 48 hours to cure adequately, while regular mixtures may take several days.
Step 7 Final Adjustments
After the concrete has cured, conduct a final check of each post for plumb and alignment. If necessary, you can make minor adjustments at this stage. Once you are satisfied with the alignment, you can proceed to attach your fence boards or panels to the posts.
Conclusion
Installing concrete fence posts is a robust solution for building a durable fence that withstands various weather conditions. By following the steps outlined in this guide, you’ll ensure that your fence posts are set correctly and will provide a stable foundation for years to come. With a little patience and attention to detail, you can create an attractive and functional boundary for your property. Happy fencing!


