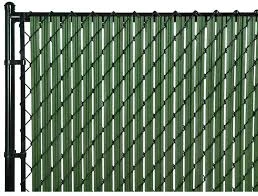
A Comprehensive Guide to Building a 4x4 Fence Post Set
Building a fence can profoundly transform your property, providing both security and aesthetic appeal. At the heart of any sturdy fence lies the fence post, and the 4x4 fence post is a popular choice due to its durability and versatility. In this article, we will explore the importance of 4x4 fence posts, the materials needed, the installation process, and maintenance tips to ensure your fence stands the test of time.
Understanding 4x4 Fence Posts
4x4 fence posts are square posts measuring four inches by four inches, typically made from wood, though composite and metal alternatives are also available. Wood remains the most common choice due to its natural look and ease of installation. Pressure-treated lumber is often used for outdoor applications, as it provides resistance against rot, insects, and harsh weather conditions.
Why Choose 4x4 Fence Posts?
1. Strength and Stability The robust design of 4x4 posts provides excellent support for various fence styles, including picket, stockade, and privacy fences. They can withstand significant force, making them ideal for areas prone to high winds or heavy snow loads.
2. Height Versatility 4x4 posts can accommodate different fence heights, allowing homeowners to customize their fencing according to their specific needs and local regulations.
3. Aesthetic Appeal These posts offer a traditional and rustic look that complements various landscaping designs, making them a favorite among homeowners.
Materials Needed
Before starting your project, gather the following materials
- 4x4 Fence Posts Depending on the length of your fence, calculate how many posts you’ll need, typically spaced 6 to 8 feet apart. - Concrete Mix For setting the posts securely in the ground. - Gravel To provide drainage and stability at the base of each post. - Wooden Fence Panels or Slats Choose the style and material that fits your aesthetic. - Tools You'll need a post hole digger, level, tape measure, saw (if cutting posts), and a hammer.
set 4x4 fence post

Installation Process
1. Planning and Layout Mark where your fence will go using stakes and string to delineate the boundaries. Ensure compliance with local zoning laws regarding fence height and placement.
2. Digging Post Holes Use the post hole digger to create holes for the 4x4 posts. Typically, holes should be about one-third the height of the post. For example, if your post is 6 feet tall, the hole should be at least 2 feet deep.
3. Setting the Posts Place a few inches of gravel at the bottom of each hole for drainage. Insert the fence post and ensure it’s plumb using a level. Fill the hole with concrete mix, making sure to slope the top away from the post to divert water.
4. Attaching the Panels Once the concrete has cured, typically after 24 to 48 hours, you can attach your fence panels or slats to the posts. Use wood screws or nails, ensuring everything is secure and aligned.
5. Finishing Touches Once installed, consider painting or staining the wood for added protection against the elements. This will also enhance the overall appearance of your fence.
Maintenance Tips
To ensure the longevity of your 4x4 fence posts, consider the following maintenance tips
- Regular Inspections Check for signs of damage, rot, or insect infestation at least once a year. - Reapply Stains or Sealants Apply a protective coating every few years to maintain the wood’s integrity and appearance. - Trim Back Vegetation Keep plants and vines away from the fence to prevent moisture buildup against the wood.
Conclusion
A 4x4 fence post set is an excellent investment for your property, providing security, beauty, and value. With a careful approach to installation and maintenance, you can create a lasting boundary that enhances your home. Whether you opt for a classic wooden look or a modern composite solution, your fence will serve as a testament to quality craftsmanship and personal style for years to come.


