fence post for chain link fence
Installing a split rail fence can transform your property by enhancing its rustic charm while also adding a functional boundary. The process might seem daunting to beginners, but with a blend of experience and a sprinkle of expertise, it is entirely achievable for the DIY enthusiast. Below, we will delve into the essentials of installing a split rail fence, offering insights grounded in experience, professional knowledge, and expert recommendations.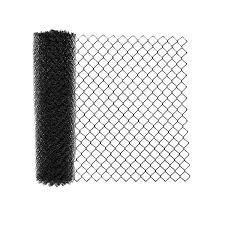
Selecting the Materials
Choosing the right materials is paramount. Split rail fences typically use wood, such as cedar or pine, known for their robustness and resistance to elements. Cedar is highly recommended due to its natural oils that deter pests and its impressive longevity. For those in termite-prone areas, treated pine could be an outstanding alternative. When selecting rails and posts, ensure they are free from cracks and knots, as these can compromise structural integrity over time. Additionally, sourcing materials from reputable suppliers known for high-quality, sustainably-sourced wood can enhance both the lifespan and visual appeal of your fence.
Planning and Design
Precise planning and thoughtful design are crucial to the success of your fencing project. Begin by mapping out the perimeter and identifying where the fence will run. Use stakes to mark post locations, ensuring they are equally spaced, typically 8 to 10 feet apart for most two or three-rail designs. Incorporate a gate in your layout if necessary. Consulting local zoning laws is vital to ensure compliance with height and boundary regulations. Accurately measuring distances and identifying obstacles such as rocks or roots will save you considerable time and effort during installation.
The Installation Process
Digging the post holes is the first step in actual installation, requiring precision and the right tools. Utilize a post hole digger to create holes that are one-third to one-half the length of the posts themselves. Depth is essential for stability, particularly in regions with frost, where deeper holes help prevent upheaval. Fill the base of each hole with gravel to improve drainage and deter wood rot.install split rail fence
Next, insert the posts and ensure they are vertically aligned using a level. Pour concrete into the holes around each post, affording greater stability, and allow it to cure fully, which can take up to a day. Rails are then inserted into the notches of the posts. A rubber mallet will help tap them securely without damaging the wood.
Finishing Touches
Finally, applying a sealant or stain can protect your fence from weather extremities. Staining is not only about protection; it can also enhance the aesthetic appeal, allowing it to blend seamlessly with your landscaping. Regular maintenance, including inspections and treatment applications, should be a part of your annual upkeep routine. This foresight will extend the life of your fence and ensure its continued beauty and functionality.
Conclusion
Installing a split rail fence is a fulfilling project that, when approached with the right mix of planning, quality materials, and adherence to best practices, can add significant value and allure to your property. By leveraging seasoned experience, professional insights, and maintaining high standards of quality and reliability, not only will you create a sturdy fence, but an enduring complement to your landscape. Trust the process, follow expert guidelines, and you will have a beautiful, functional border that stands the test of time.


