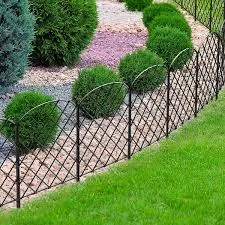
Installing Round Wood Fence Posts A Step-by-Step Guide
Installing round wood fence posts is an essential task for anyone looking to create a sturdy, attractive fence. Whether you’re enclosing your yard, establishing a boundary, or enhancing your garden, using round wood posts can provide a rustic charm and durability to your fencing project. This guide will walk you through the steps to successfully install round wood fence posts, ensuring a lasting and professional-looking fence.
Materials Needed
Before you begin, gather the necessary materials and tools
1. Round Wood Fence Posts Choose treated wood to resist rot and insect damage. 2. Concrete Mix For securing the posts in the ground. 3. Gravel To enhance drainage around the posts. 4. Post Level To ensure your posts are upright. 5. String Line For straight alignment. 6. Shovel or Post Hole Digger For digging the post holes. 7. Measuring Tape For accurate spacing. 8. Hammer and Nails or Wood Screws For attaching fence panels. 9. Safety Gear Gloves and safety goggles.
Step 1 Planning and Measuring
Before you start digging, you need to plan the layout of your fence. Determine where you want the fence line to go and measure the distance between each post. A typical distance between posts is 6 to 8 feet, but this can vary based on the type of fence and the terrain.
Once you have your measurements, mark the locations of the posts using stakes and a string line. This will help you maintain a straight line as you install the posts.
Step 2 Digging the Post Holes
Using a shovel or a post hole digger, dig holes for the fence posts. The depth of the holes should be approximately one-third the height of the post above ground; for instance, if your posts are 6 feet tall, the holes should be around 2 feet deep. The diameter of the hole should be at least three times the width of the post to allow for sufficient concrete and gravel.
Step 3 Setting the Posts
installing round wood fence posts

Place a few inches of gravel at the bottom of each hole for drainage. Then, insert the round wood post into the hole. Use a post level to ensure that the post is vertical. This step is crucial for ensuring the integrity of the fence.
Once the post is level, backfill the hole with concrete mix, following the manufacturer's instructions. Make sure to tamp down the concrete to remove any air pockets. Allow the concrete to cure according to the instructions, usually about 24 to 48 hours.
Step 4 Attaching the Fence Panels
After the concrete has set and the posts are secure, it’s time to attach your fence panels. Start by measuring the height of the panels and marking where they will go on the posts. Align the panels with the posts and use a level to ensure they are straight. Secure the panels to the posts using nails or screws.
Continue this process until all panels are attached. Take care to maintain uniform spacing between panels for a neat appearance.
Step 5 Finishing Touches
Once your fence is complete, you may want to add some finishing touches. Consider applying a wood preservative or sealant to protect the wood from the elements. You can also paint or stain the fence for added curb appeal.
Regular maintenance, such as checking for loose panels and applying new sealant as needed, will ensure that your round wood fence remains sturdy and attractive for years to come.
Conclusion
Installing round wood fence posts can be a rewarding DIY project that enhances your property. By following these steps, you can achieve a functional and beautiful fence that adds value to your home. With careful planning and execution, your fence will stand the test of time, providing security and style. Happy fencing!


