Creating a DIY Puppy Pen for Outdoor Use
Bringing a new puppy into your home is an exciting and rewarding experience. However, it also comes with the responsibility of ensuring their safety while allowing them to enjoy the great outdoors. A DIY puppy pen outside can provide a secure space for your furry friend to play and explore without the risk of them running away or getting into trouble. In this article, we’ll guide you through creating a simple and effective outdoor puppy pen.
Planning Your Puppy Pen
Before you begin building, it’s essential to consider your puppy’s size, breed, and activity level. Smaller breeds may require less space than larger, more energetic ones. Think about the area you have available as well — a yard or garden can be a perfect location. The pen should be large enough to give your puppy room to run around, play with toys, and lay down comfortably.
Materials Needed
To construct your DIY puppy pen, you will need the following materials
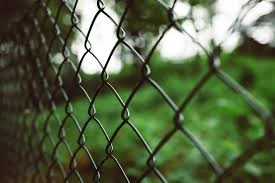
1. Fencing Panels You can use wooden pallets, chain-link fencing, or even specialized pet fencing panels. Make sure the material is durable and safe for your puppy.
2. Ground Stakes or Concrete Blocks These will help secure the pen to the ground, preventing it from being moved or tipped over by your puppy.
3. Hinges and Latch If you wish to have a gate, you’ll need hinges and a latch or lock to keep the door secure.
5. Tools You may need tools such as a power drill, hammer, and screwdriver to assemble your pen.
diy puppy pen outside

Building Your Puppy Pen
1. Choose a Location Select a flat, dry area in your yard that is free from hazards like sharp objects or toxic plants. Ensure there is also sufficient shade so your puppy can stay cool during hot days.
2. Measure and Mark Decide on the dimensions of your puppy pen. Typically, a space of at least 10 feet by 10 feet is reasonable for most puppies. Use stakes or spray paint to outline the area.
3. Install the Fencing Panels Start by placing the fencing panels around the perimeter of your marked area. Make sure they are tall enough to prevent your puppy from jumping over. For larger dogs, consider panels that are at least 5 feet tall. Secure the panels to the ground with stakes or concrete blocks.
4. Create a Gate Leave an opening for a gate. Use one of your fencing panels as a door, attaching it with hinges to one side. Install a latch to ensure it stays closed while your puppy is inside.
5. Add Ground Cover If your pen is on grass, that’s great! If not, consider adding soft ground cover, such as outdoor mats or artificial turf, to provide a comfortable area for your puppy to sit and play.
6. Enhance the Space To make your puppy pen more enjoyable, add toys, a water bowl, and a comfortable bed. If you want to create a shaded area, you can drape a tarp over part of the pen.
Final Touches and Safety Tips
Once your pen is complete, spend some time supervising your puppy in their new space. This will help them adjust to the area and associate it with positive experiences. Make sure to check the pen regularly for any wear and tear or potential escape routes.
Remember to always supervise your puppy when they are outside, especially during their initial outings in the pen. This ensures their safety and helps prevent any accidents.
Building a DIY puppy pen outside is a fun and productive project that provides your puppy with a secure and enjoyable space to play. With a little planning and effort, you can create an outdoor sanctuary that will keep your furry friend safe and happy while they explore the wonders of nature!


