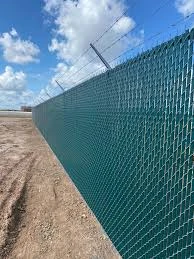
The Best Way to Set Wood Fence Posts
Installing a wood fence can significantly enhance the aesthetic and functional aspects of your property. One crucial step in this process is setting the fence posts, which serve as the backbone of your fence. Properly installed posts not only ensure the stability of the entire structure but also prolong its lifespan. Here, we’ll explore the best way to set wood fence posts, ensuring your project is both effective and efficient.
Planning and Preparation
Before you begin setting your posts, meticulous planning is essential. Identify the area where your fence will be installed, ensuring compliance with local zoning regulations and property lines. It’s always wise to check for any underground utilities by calling the local utility company.
Once you have a clear plan, gather your materials. You will need treated wood fence posts, gravel, concrete (if desired), a digger, a level, measuring tape, and possibly a saw if you need to cut the posts to the proper length.
Digging the Hole
The first physical step in setting the posts is digging the holes. The depth of the hole should be about one-third the height of the post that will be above ground; for instance, a six-foot tall post should be set in a two-foot deep hole. The width of the hole should be about three times the width of the post. This will provide ample space for the post to be securely anchored.
Use a post hole digger or an auger for this task, ensuring the sides of the hole are relatively straight. Additionally, consider digging the holes in advance, allowing any loose soil to settle before you proceed with setting the posts.
Positioning the Posts
Once the holes are dug, it’s time to place the wood posts. Position the post in the center of the hole and ensure it is level. A level post is essential to maintaining a straight fence line. You can use stakes and string to create a guideline for a straight alignment.
For increased stability, add a couple of inches of gravel at the bottom of the hole before placing the post. This will help with drainage and prevent water from pooling at the base of the post, which can lead to rot.
best way to set wood fence posts

Securing the Posts
At this point, you have two primary options to secure your posts using gravel or concrete.
1. Gravel If you prefer a more flexible option, fill the hole with gravel. Pack it around the post firmly, ensuring it is level. This method allows for drainage and can be effective in most soil conditions.
2. Concrete For posts that need extra stability, such as those supporting a gate, using concrete is advisable. Pour a pre-mixed concrete mix into the hole around the post and add water as per the product instructions. Ensure the post remains level as the concrete begins to set. This process may take a couple of days for the concrete to cure fully, but the added stability is often worth the wait.
Final Adjustments
After securing the posts, it’s essential to make any final adjustments. Check that each post is perfectly vertical with a level, and if necessary, make adjustments before the concrete sets completely.
Allowing Time to Cure
If you used concrete, allow it to cure for the recommended time, typically at least 24-48 hours, before attaching the fence panels. This period is crucial to ensure that the posts are stable and won’t shift under the weight of the fence.
Conclusion
Setting wood fence posts might seem like a daunting task, but with the right preparation and technique, it can be straightforward and rewarding. Whether you choose gravel or concrete as your anchoring method, the vital factors are depth, alignment, and stability. By following these steps, you can ensure that your wood fence stands strong and enhances your property’s curb appeal for years to come. Happy fencing!


